


A slab leak is water or sewage escaping from a pipe underneath your concrete foundation. In San Antonio it usually turns out to be one of two things: a copper water line under pressure, or a cast iron sewer line that has rusted through after fifty or sixty years. The repair is different for each, and so is the price.
Goody’s Plumbing does slab leak location, tunneling, and under-slab sewer and water line replacement across San Antonio, Bulverde, New Braunfels and the Hill Country. This page covers what tunneling under the slab actually involves, who inspects it, what decides whether it lasts, and the questions we get asked most.
Is mine a water line or a sewer line?
It matters more than anything else on this page, because it decides your options.
A water line is under constant pressure, so it announces itself: a hot spot on the floor, a water bill that jumped for no reason, the sound of running water with everything shut off, or a meter that keeps ticking over after the house is off.
A sewer line is not under pressure, so it hides. It shows up as drains that back up or run slow, a smell, a patch of yard that stays wet or grows better than the rest, or cracked and lifting flooring. Plenty of people find out during a home sale instead.
Why do slab leaks happen so often in San Antonio?
The ground. Most of this area sits on expansive clay over limestone, and that clay swells when it’s wet and shrinks when it’s dry. Our weather swings between both, so the soil under a slab is moving through the year, every year. It moves the foundation, and the foundation moves the pipes cast into it and running beneath it.
Age does the rest. Houses built before about 1980 were plumbed underground in cast iron, which corrodes from the inside out. Alamo Heights, Terrell Hills, Olmos Park, Monte Vista, King William and the older parts of town are full of pipe that’s now past its service life.
My hydrostatic test failed. What happens now?
A hydrostatic test plugs the drain system and fills it with water to a set level. If the level drops, the system is losing water somewhere below the floor. It’s how most people first learn they have a problem, and it very often happens during a real estate transaction, with a closing date already on the calendar.
A failed test tells you there’s a leak. It doesn’t tell you where. The next step is isolating it, section by section, and putting a camera down the line to see the actual break. That’s what decides whether you need a tunnel at all, where it starts, and how long it has to be.
If you’re under contract and working to a deadline, say so when you call. It changes how we schedule it.
Tunnel, reroute, or break the slab — which one do I need?
There are three ways to reach a pipe under a foundation, and you should understand all three before you accept a bid on any of them.
- Reroute. Abandon the bad section and run a new line overhead or around, through the attic and walls. Often the fastest and cheapest answer for a water line. It does not work for sewer, because drains run downhill and can’t be routed through an attic.
- Break the slab. Cut through the floor from inside, dig down, fix the pipe, patch the concrete. Cheaper on the plumbing, and much more expensive on everything else, because the flooring above it comes out and doesn’t go back. Tile, wood and stone rarely survive it, and the dust goes through the whole house.
- Tunnel. Dig in from outside the foundation and work underneath it. Nothing inside the house is opened up. Costs more in excavation than breaking the slab, and usually less once you add back the floor covering, the dust remediation and living in a construction site.
For a sewer line under an occupied house with finished floors, tunneling is normally the answer. For a single water line leak, a reroute often is. Before you accept a bid on any of them, ask why the other two were ruled out.
What actually happens during a tunnel job?
We locate it first, precisely. Guessing is expensive here, because the location decides where the tunnel starts and how far it has to run.
We open the tunnel from outside. It starts at the exterior of the foundation and runs in to the failed section. Your flooring stays where it is.
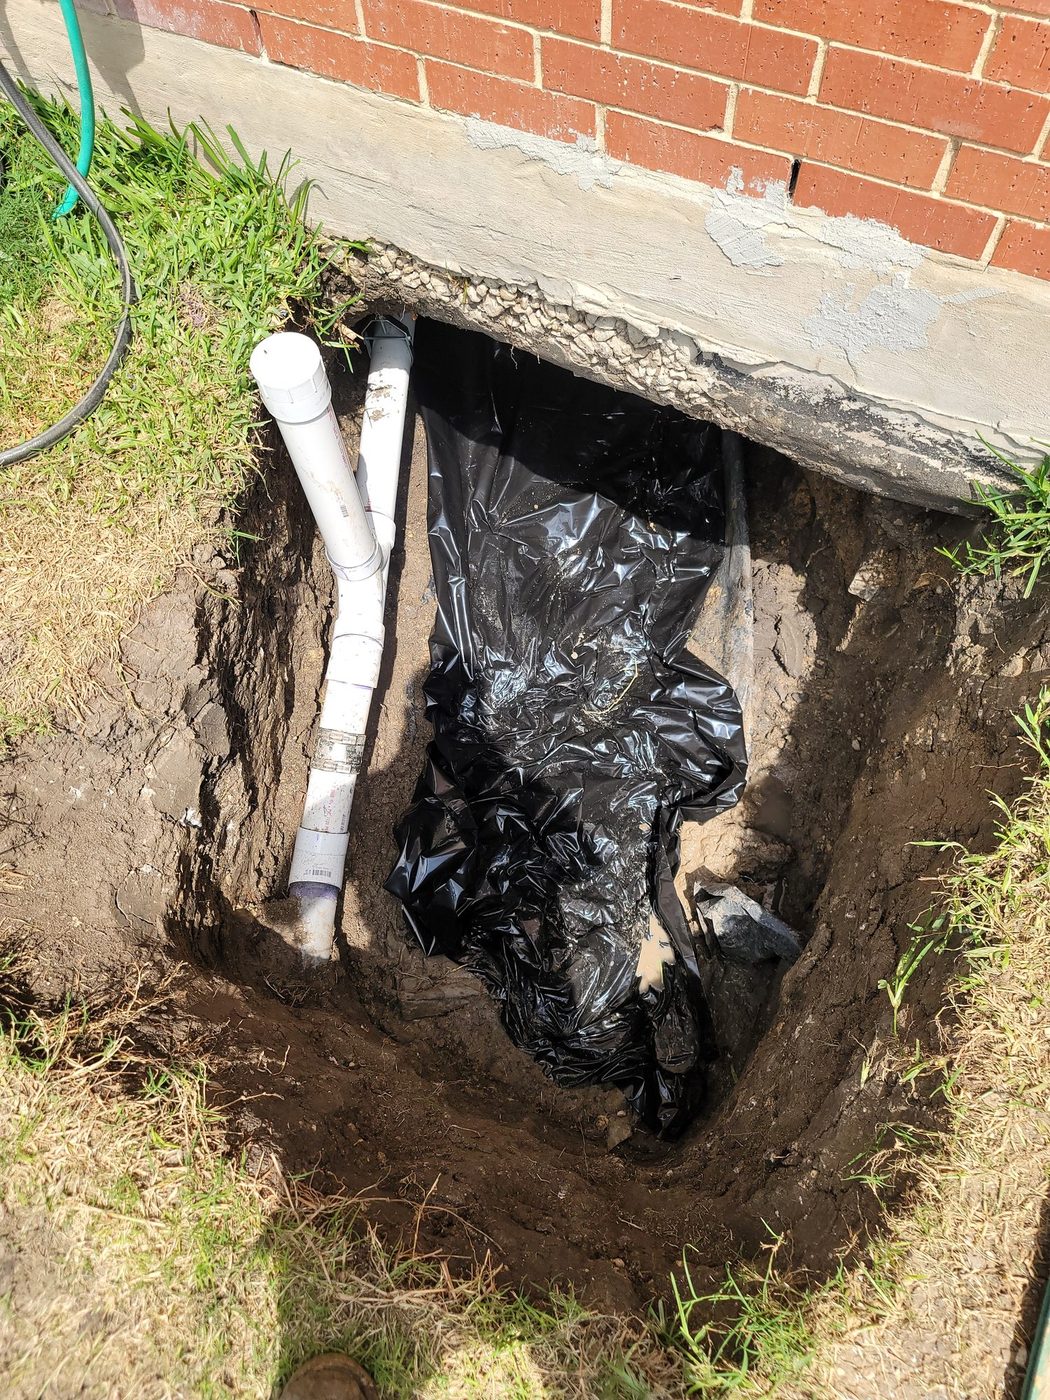
We replace the pipe and test it before anything is covered back up.
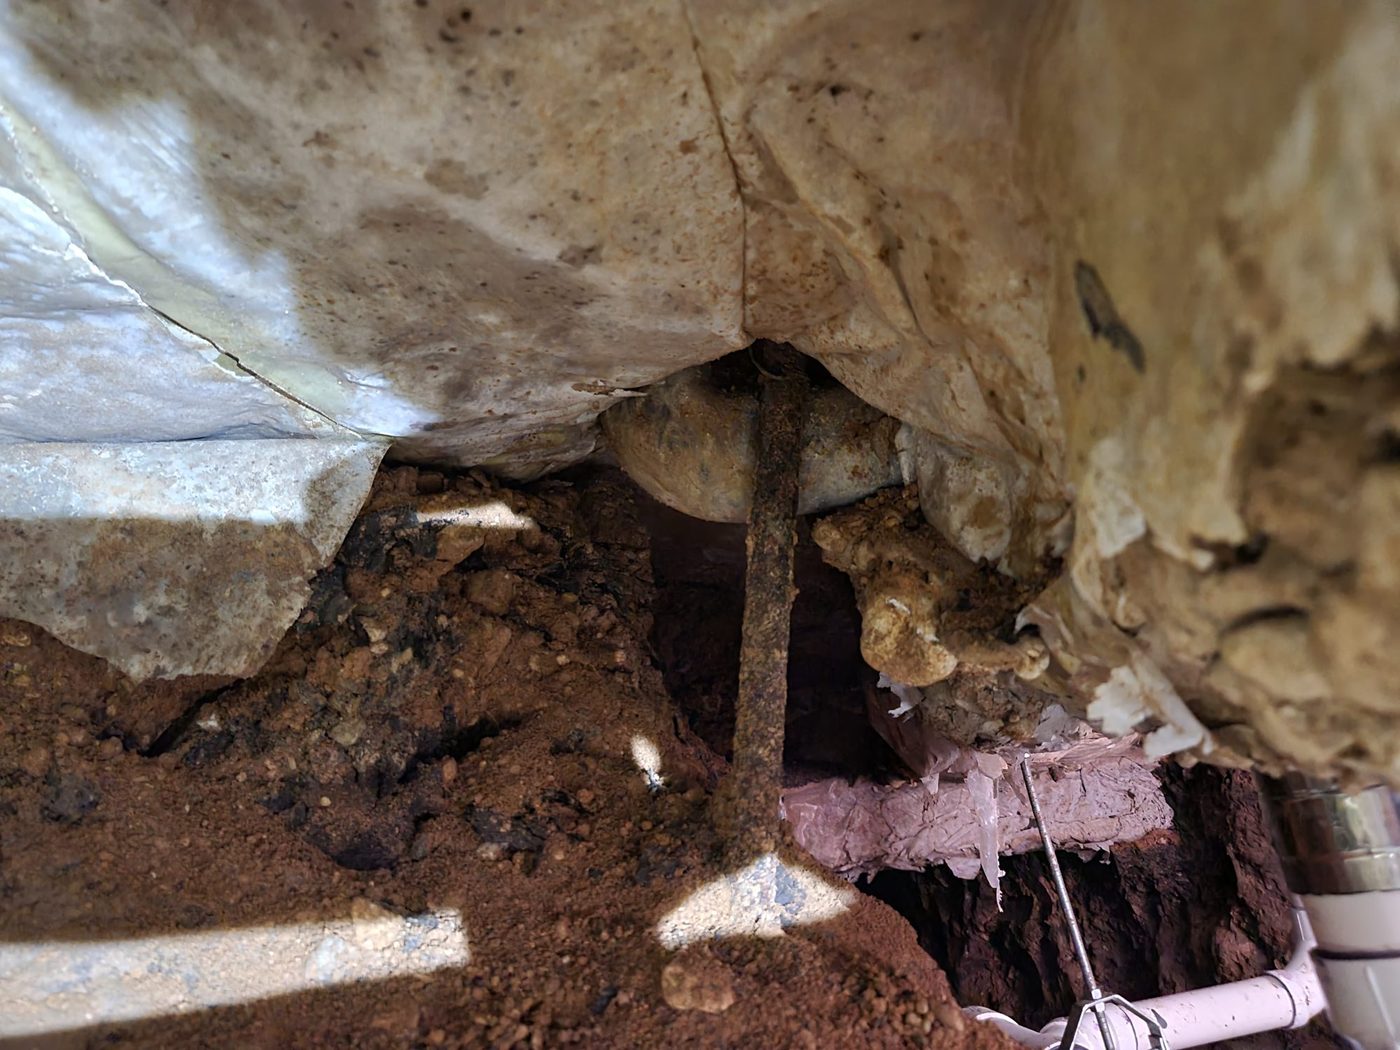
Then two inspections, not one. This is the part homeowners are most often surprised by. A city plumbing inspection confirms the repair meets code, and a structural engineer’s report confirms the tunneling hasn’t compromised your foundation. Both are required. We pull the permit under our license and coordinate both, so the scheduling and the approvals aren’t your problem.
Then backfill, compaction and cleanup. The tunnel is filled and compacted in lifts as it goes back in, and the property is left clean.
Will my foundation settle after the tunnel is filled back in?
This is the right question to ask, and it has two halves.
The tunnel itself is backfilled and compacted as it’s closed, in layers rather than all at once, and the structural engineer’s report is the check on that work.
The pipe is the other half, and it’s the one that decides whether you do this again in ten years. Backfill settles. It settles no matter how well it’s compacted, because that’s what disturbed soil does. A new pipe laid on that soil settles with it, loses its fall, holds water, and eventually pulls a joint apart.
We don’t lay it. We hang the line from the underside of the slab on threaded rod and strapping, and it holds the grade we set it at no matter what the dirt underneath does afterward. The branches and the risers get carried the same way. Every solvent-weld joint gets primer, which is the only way an inspector can tell from outside that the joint was made correctly.
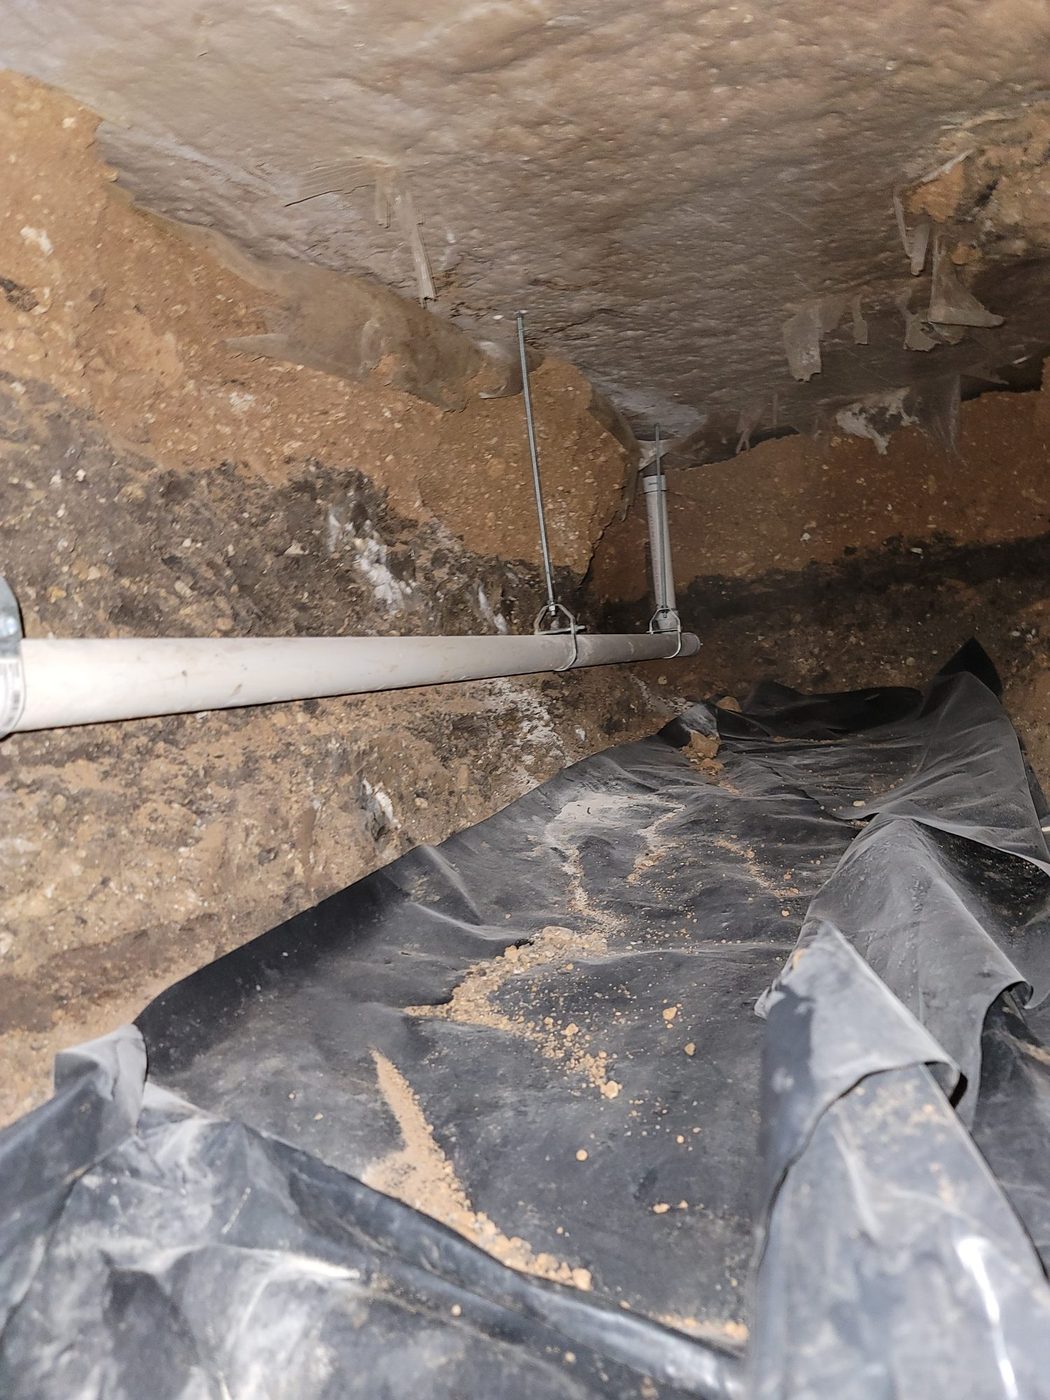
When you’re comparing bids, ask each contractor whether the new line will be hung or laid, and get the answer in writing.
My house is from the 1970s. Do I have cast iron, and does all of it have to go?
If your house went up before roughly 1980, the drains under the slab are almost certainly cast iron. Cast iron corrodes from the inside, so the wall thins for decades before anything shows. By the time one section fails, the rest of the run is usually the same age and in the same condition.
That doesn’t automatically mean all of it comes out. What it means is that the line gets a camera run end to end before anyone prices anything, so you’re deciding with the whole picture instead of the one spot that failed. Sometimes the answer is a section. Sometimes it’s the whole run out to the city connection, and doing half of it means opening the tunnel again later.
Can I stay in the house while the work is going on?
Usually, yes. The excavation is outside and the floors stay down, which is most of the reason people choose tunneling in the first place.
Water will be off for stretches of it, and there will be a machine and a spoil pile in your yard. If the sewer line for the whole house is out, the bathrooms are out with it while it’s disconnected. We’ll tell you which days those are before we start.
Does homeowners insurance cover a slab leak?
Sometimes, partly, and the answer is in your policy rather than in anything a plumber tells you.
What’s common: many policies pay to access the pipe — the tunneling or the concrete work — and to repair the water damage, while not paying to replace the pipe itself. Sudden and accidental damage is treated very differently from slow deterioration over years, and cast iron that corroded gradually is often read as the second one.
Read your declarations page and call your carrier before you assume either way. We’ll document what we find and what we did, which is what an adjuster needs.
How much does it cost, and how long does it take?
It depends on the depth of the foundation, the soil, how far the tunnel has to run, and what’s actually wrong once the pipe is exposed. A firm number given before the leak is located comes back later as a change order.
What we do instead: find it, camera it, show you what’s there, then price it. Harley Hart holds the Master Plumber license (RMP #43467), does the estimating himself, and supervises the job, so the number on your bid comes from the person responsible for the work.
Talk to us
We do slab leak location, tunneling, under-slab sewer and water line replacement and cast iron replacement across San Antonio, Bulverde, New Braunfels and the Hill Country, and we handle the whole thing: the detection, the excavation, the repair, the permit, both inspections and the cleanup.
Call 830-837-2810 and a person answers, or send us the details and we’ll come out and look. The rest of what we do in a house is on the high-end residential plumbing page.